Tuesday, July 23, 2013

Rolling Trusses, the start

After the weekend, they didn't get back out until Tue although they were supposed to be out there all week.  They got about 40% set and then called it.  Have been chasing them down the last couple days to get back to finish.  I really want to get OSB on the roof to help protect a bit while we still have another week of sunny weather.

Front covered porch starting to look like something.


View looking out the master bath window toward the front of the house.  I have started terracing the slope and will build rock retaining walls in the future.

Kiddos picking up nails and scrap wood.


Setting Trusses

First there was a delay because the framer wasn't ready and then the truss delayed a day because they weren't ready.  They were scheduled to arrive first thing on Friday morning but someone forgot to get permits in for the oversize load ... so the delivery was changed to 11-12 but actually didn't show up until closer to 1pm.  For some reason, the framer let all his guys go so he was the only one setting them.

I got up there about 3pm and finished helping offload and get them braced up on the walls.

The framer multitasking - talking on cell while directing trusses.


Main Floor Framing

Framing upstairs has started so we no longer have a wide open dance floor with no rails.  The perimeter walls were framed and sheeted which really made it take shape.


Started laying down the drainage pipe that will actually be underneath the front porch.  I seriously doubt water will ever make it that far as the porch is covered and I will have a french drain right in front of the porch as well - I don't want any water making it's way toward the basement even though the drainage out there is amazing.


I installed the sonotubes on top of the 24" pier pads for the front deck support.

I started putting the Delta Drain against the foundation before I backfilled.

Looking at the dining room


Breakfast nook with windows completely surrounding.  Can't wait to eat breakfast and just see nature all around us.

Starting to frame in the dining room

Pit for the alligators when the kids are being not no nice.


After a week, the garage was finished and the interior walls were completed.


Monday, July 22, 2013

Financing Update

After getting verbal approval from the bank, we have been moving along with quite a bit accomplished thus far.  I called to check on the status because the date to pay off land was 1 Jun per the agreement with the land owners.  The bank missed the date and then said by 1 July .... so when that date passed, I was getting a little concerned.

The 'package' as they call it got all wrapped up and sent before loan committee which we thought would breeze through.  Well, one person is being nit picky about silly things and so more back and forth with documents. (they now have like 5 sets of various paystubs so not sure if they think that I'm loosing my job since it is still the same as the previous month).  Other oddball stuff but after about 1.5 weeks, I think we have everything worked out.  Not.  It now has to go before the president of the bank (they have 20 branches so not small).  I was surprised at this because this never was discussed so not sure if a good thing or not.

A few days pass and the loan officer informs me that evidently I have the largest owner-builder construction loan they have ever processed in the history of the bank.  Oh My Gosh!

Finally I get the call from our loan officer that the ExecVP (#2 at the bank) and a Regional Sr VP want to meet me at the property.  Not sure if that is a good thing or not but am thinking positive.  I meet with them about 1pm in the afternoon, I'm in work clothes running the excavator and they are all decked out.  We met for about an hour and they 'quizzed' me about construction and various processes in the permitting area.  I answered all of them and had a good conversation.  Before they left, the ExecVP, Bob, told me that he wants to put my stress level at ease and the bank is going to approve me.  Awesome, thank the Lord!!

He said that we should have the money within three weeks which is just in time to pay my large credit card bills.  I'm hoping all comes through.  Stay tuned.

Friday, July 19, 2013

Basement Framing and Subfloor

Now that all the walls in the basement are framed, the next step is installing the floor joists and subfloor.  We have some large spans of open space (20'+) and I didn't want any poles in basement so had to beef up the TGIs.

The middle section will be where the pool table, dart board, etc goes.  Against the far wall will be TV and game consoles, plan to unpack the oldies:  Atari 2600 (original), SNES, Sega Genesis, Nintendo 64, Nintendo GameCube, PlS2, Wii, PS3


From this direction, you can see C office on the right and spare bedroom in the corner.  There is a bathroom in the far left corner.


The floor joists started laying out pretty quickly but the supplier failed to ship (11) 16' and sent (8) 8' instead of (8) 9' so weren't able to finish.  Took an extra day to get materials out there.


I upgraded the subfloor to the Edge Gold (something like $35/sheet) but is guaranteed not to delam or warp for 200 days.  Hopefully I wont have to test that claim out.

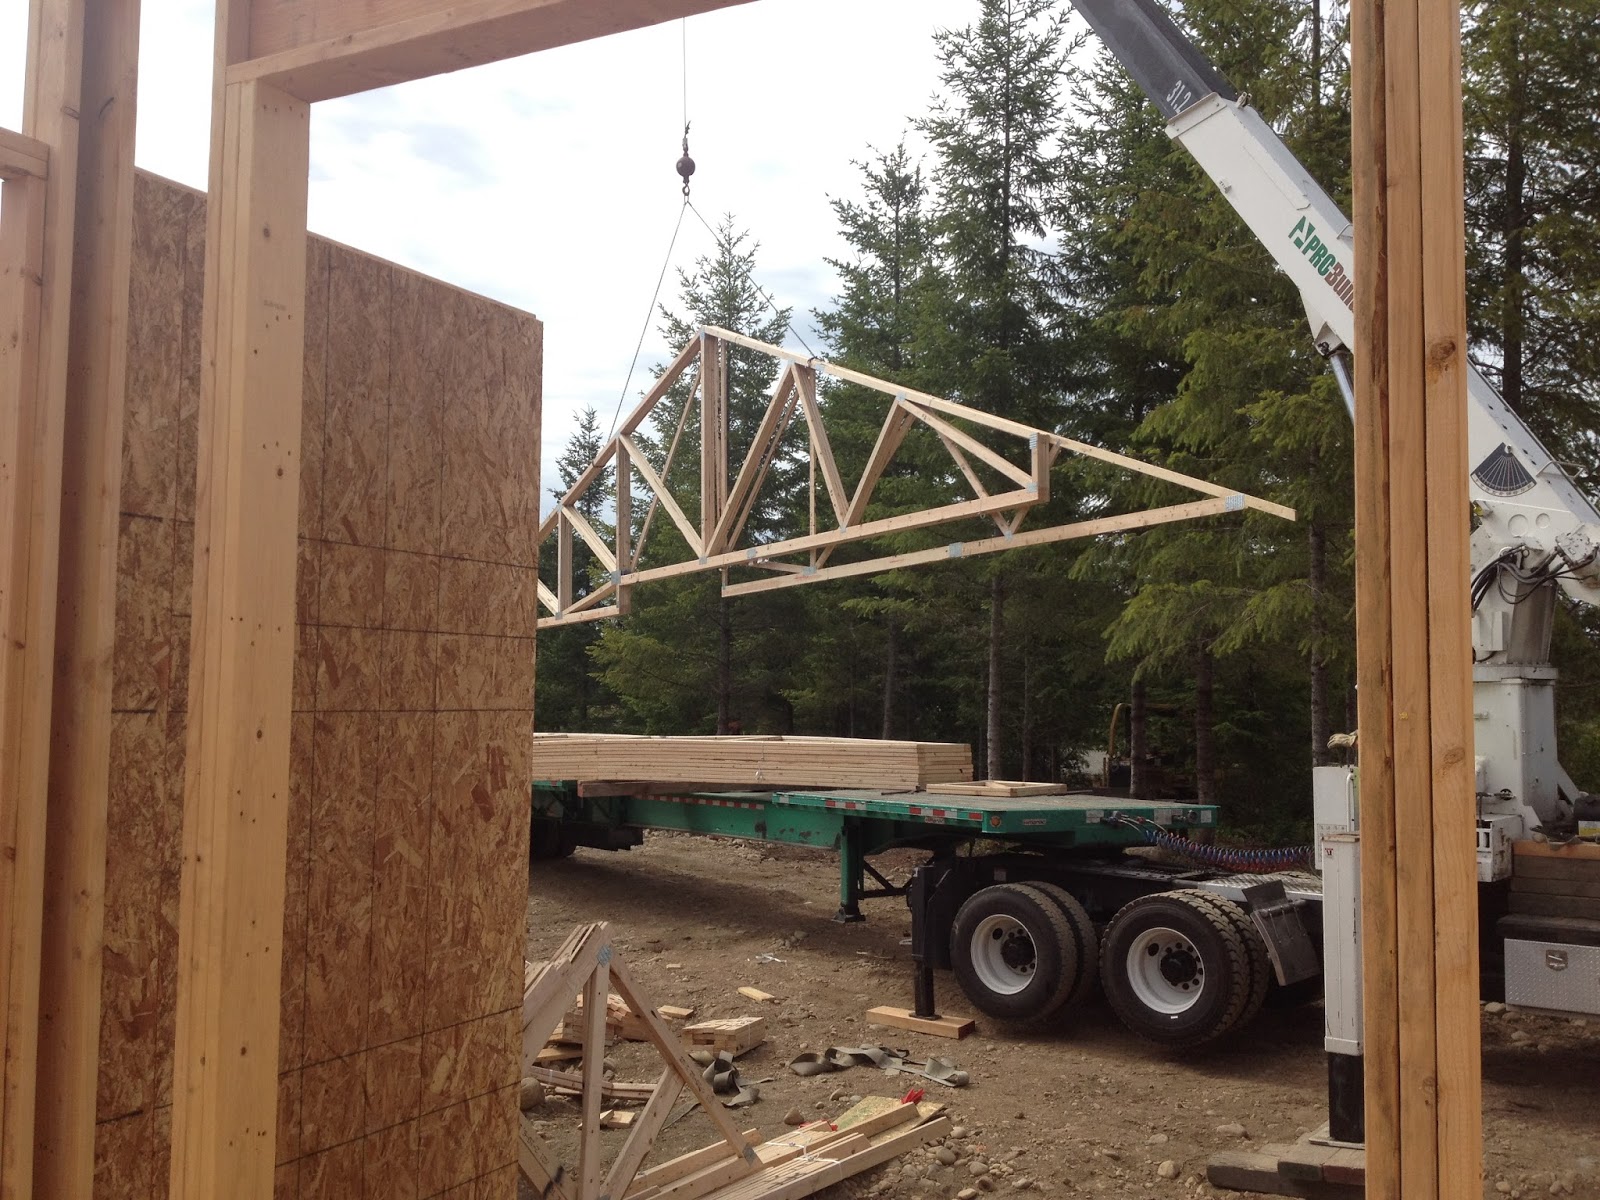
I just finished helping load up about 30 sheets of the subfloor (HEAVY) and the framer/truss guy are going over the details of the layout.  Lots of small details to make sure everything is correct before building the trusses.  It is a pretty complicated layout and definitely an expensive line item


He said it will take about two weeks to build the truss and no reason why framing the upstairs can't be done in that amount of time.  We'll see.

Basement Framing

The framing started the next week and the plates and the back wall went up pretty quick.

Here's C enjoying the view from her future office.


Two days later they sheeted the exterior and braced the walls.  First rain but the wood really didn't get wet too bad.  I changed to Doug Fir instead of Hemlock Fir (more costly) as it is the best structural lumber by far.


Meanwhile, I have so much backfilling to do that it will probably take me a couple months before everything is done.  As I finish off sections of the waterproofing, I will try and move dirt but the biggest areas are the front of the house and the garage.

I have to raise up the the garage floor about 3' and for a 1300 sq ft area, that is a lot of material..  

Plus the front of the house is excavated out about 15' away from foundation where the pier pads were poured.  Once I pour the sonotubes, that will be about 50+ yds of dirt to fill in.

At least we are starting to see the house take shape now.  

Basement Slab

Called for the rough in inspection so we could pour the slab.  I called the inspector the morning of (not the most personable guy) to see what time he would be coming as I wanted to make sure I was onsite in case I needed to do any quick modifications to prevent a failed inspection.  Luckily he was sending another guy who turned out to be super nice.  He gave me a 90min window and even told me one of the common reasons for failure - not wrapping the pipes with some type of barrier when they go through concrete (note - not in the code).  Thank goodness he told me and I ran out to get some insulation and wrapped around the drain pipes sticking up.

He showed up, inspected the gravel/vapor barrier and then went over to check the water level.  The 3" drain had 10' head and was topped off.  Everything passed and the pipes were holding water.

Slab pour was scheduled next morning at 6am and was expected to be beautiful weather.

Ended up having the same pump truck guy and we worked out a deal for payment that saved me a couple hundred - always good.  After 30 yards of mud, the guys worked for about 4-5 more hours doing the power trowel and edging.  Sure does look purty


The grading for the crawlspace is sloped nice but need to trim the Delta Drain.  I know this is overkill to put tar on walls and the Delta inside the crawlspace but I'm paranoid about water inside the basement.  $1000 is peace of mind.


Prep for Basement Slab

After we finished the rough in plumbing, had to get 4" pea gravel set, vapor barrier laid down, and rebar set.  I estimated that I needed about 30 yds of pea gravel (didn't use crusher run because pea is self compacting) but the quarry only sold by tons about the equivalent was roughly 32-35tons of gravel.  So, order up a full load that was 32.68 tons .... that was way short so ended up having to order another full load and had about 4-5 yds left over.  What I didn't think about was that the gravel was wet so I was paying for water weight but was way short on material (lesson learned).

John was bringing the gravel via backhoe and dumping inside the walls, then I would use the Dingo to move and spread around the basement area.  This took about 3 days to complete and one day a neighbor, Mike, who is also building down the street stopped by with his backhoe and helped out as well.


 After getting it spread 4" thick, we spread out the 6mil vapor barrier (aka plastic sheet) and overlapped the joints 12".  I had wanted to tape the seams (best practice) but it rained so wasn't able to.


 Finally after many hours of prep work, finished off the the area with all rebar tied in an 8'x8' grid.  Big thanks to John for helping out to get this done (Note - this will become a common theme :-)  Next stop, basement floors.