Thursday, October 24, 2013

Plumbing Rough-In Starts

This turned out to be such a long process and grateful to John for figuring out all the runs and connection points.  Sammy (retired master plumber) also came out and provided guidance during the process.

In the 4'+ crawl space looking at the 3" line


Vents and drains in place for kids bathrooms.


On with the Roof

We have been so fortunate that it has only rained one time since the subfloor went down and even though we used Gold Edge which can be out in the weather for months, I didn't want to test it.

Worked out a great deal on the roof for cheaper than I could have done it so these guys came in and knocked it out in two days ... 81 squares which was 240 bundles of shingles.  That's a lot.

They finished on a Friday and it rained that night - no water inside.  Love it.


Framing Wrapping Up

Finally the framing is getting ready to be finished.  It has taken much longer than the framer said and that was because he had a couple other jobs going on at the same time.  I understand the need to maximize projects during the summer but it is costing me money at this point.  Talked with the framer and he said he wouldn't do the other job until mine was done ... well that lasted about 4 days.

Anyway, starting to see the light.  The staircase to the basement is being put in so we no longer have to walk around the house to get to the basement.


Since the basement is 'unfinished', the wall has to be closed off and a fire door installed.  Knowing we would finish the basement at some point and want to have the staircase open when coming down the stairs, put in a header to carry the load so we could remove all the studs and the door that is showing below.

Loft framing is done and now there is a nice little sitting perch.  B likes to go up there and hang out ... once we get books in the library, he may never come down.


The rear deck roof is now framed and provides an amazing look out to the property.


Have started playing around the fireplace size and location.  I grew up with wood fireplaces and always wanted one and now that we have plenty of wood, we will have one.  Planning on getting the Fireplace Xtrordinair 44 Elite (http://www.fireplacex.com/ProductGuide/ProductDetail.aspx?modelsku=98500113) with the Artisan Face.  It is large and puts out some serious heat so the plan is to offset the electrical bill during the winter.

Here are some pics of just putting some boards up to get an idea of how we want it to look.


Catching Up

It's been quite a while since my last post and lots of people asking about updates so I'm going to try and get caught up.

I never imagined being the GC and doing alot of the work myself was going to take soooooo long. Even with all the research and planning I did, still wasn't prepared. Thankfully I've had the help of my dad, John, and the wife (kids too) for much of the time.

During the process, I've learned so much more than I ever knew before, met some really nice people and found many contractors that aren't good.  Have been fortunate and stepped into some really nice opportunities and savings that helped reduced overall costs that I had not planned on.  I will elaborate when I start updating the posts.

We are behind schedule quite a bit (about 6 weeks) but the framer was partially responsible and I just didn't allocate enough time.  I had hoped to be in the house by Christmas but doesn't look like we will make it after all.

Stay tuned and I should have lots of updates coming shortly .....

Tuesday, August 6, 2013

The Nook

It was a late decision to add this feature but figured (Cs idea), what the heck.  Looked nice on the blueprints but now that it is getting framed out, WOW.

It will be our library, we are a family of readers so it made sense for us to have a location to house all the books.  Also a nice little getaway when the kids are driving us crazy ... I just have to figure out how to retract the stairs.

View from behind the spiral staircase leading into room.


A little tree topping and should have a nice view on the deck outside the nook area.


Rear Deck part two

We started early Sun morning as we knew it would be another long day and it was going to be toasty warm too.  Started by building a jig to place two hangers at a time and keep everything in line.

Dad working on finishing up the joist hangers
The joists that were specd were 2x10x16 and while they can technically span that far, I didn't feel comfortable and decided to upgraded to 2x12x16s.  Definitely a lot  more sturdy but dang those are heavy.  We got about 1/2 of them set before C and the kids showed up.  She was able to help lift each side as we carried up the ladder which was another big help.


For the size of joists, the hangers called for 10d (3") nails and they had to be galvanized because of the pressure treated lumber.  Each hanger took 12 nails that had to be hammered in - my nail gun doesn't have the attachment to locate the hanger holes nor does it accept galvanized nails.  Ended up driving over 600 nails and was using two hands toward the end as my forearms were on 'fire'.


In between helping with the joists, C was busy with the Dingo leveling out the area and getting rid of piles of rock.  Looks so much better and can easily walk around without tripping all the time.


We finished up as it was starting to get dark but the main section was complete.  At least now, the framers have a platform to work on for the upper roof now.  Dad and I were both completely drained and glad Monday wasn't a construction day :-)  I was more sore the next day than the Ironman 70.3s I did.


The framers have to finish nailing the OSB joints so we couldn't put the ledger up for this part of the deck (outside master bedroom).  We will finish this up next weekend.


What do you do in a weekend, build a deck?

We are going to have a really nice (large) rear deck (16x22 covered, with an 8x20 uncovered) but ran into some assumption/terminology issues.  When we started building, I told the framer I would take care of the deck to help keep costs down.  Now to me, that meant I would do the ledger, joists, decking and he would do the post and beams supporting the deck since they were required for the upper covered roof.  Well, that isn't how he took it, he thought I was building the entire deck (framing included) and he would build the cover on top of it.

To a non normal framer guy, I thought he was crazy so asked a builder colleague and he confirmed the same.  He said I should have clarified my intent but I never thought it needed to be.  So, lessen learned here is to always communicate and don't make assumptions, it can be costly.

The framer didn't want to do it because already behind (remember he has some other jobs going on) but would do it for a minimum of $1500 and if I brought all the materials down to the rear of the house.  I really didn't want to pay that much for the framing (although a good price for the amount of work that I realized later)

On the flip side, it was good opportunity to build a huge elevated deck, not something I had done before.  I already had poured the footings and piers so just needed to measure and set the posts using ABU66s (about $50/ea).

My dad arrived this week and will be staying for several months during the build which will be HUGE help.  We put up the main ledger that attaches to the house for the joists to connect.  Marked out all the joists so they would line up with the floor joists (inside the house) so the bolt pattern wouldn't conflict.  Plus, the code now calls for lateral bracing and I will be using Simpson DTT2 so having everything in line makes installation easier.


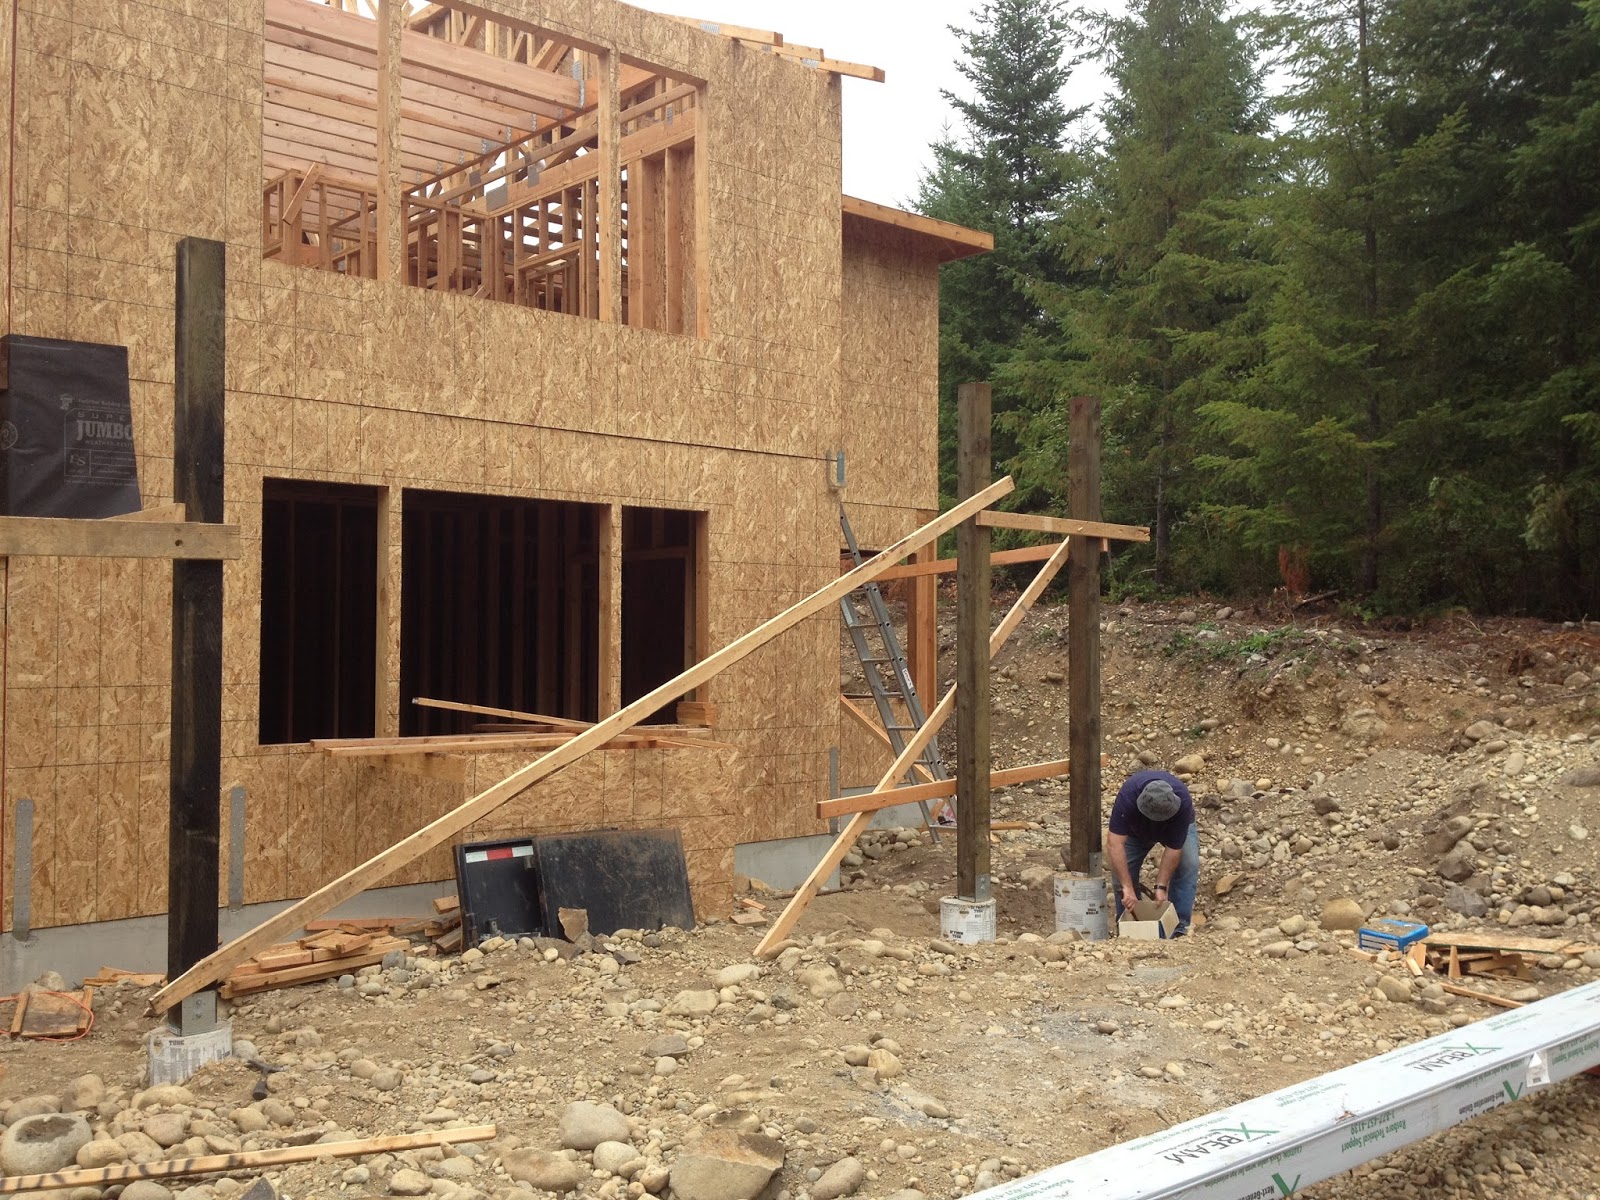
Brought Joe (friend of John who is a framer) in to assist with post layout and bracing.  This turned out to much longer than I had anticipated but good learning experience.


After we got all the brackets marked, we started installing the 6x6x10 posts and securing them to the brackets.


 Then we established our reference mark from the ledger and used the transit to mark all the posts.  Measured up and then cut all the posts.  Pulled a string line and four posts were exact and two posts were less than 1/8" off so not bad.


We put the first beam (5 1/2" x 12" x 9') up and marked the long and short edges.  I used a skill saw set to 45 degrees and scored around the beam.  Then used a reciprocating saw to finish the cut all the way through.  This will provide a nice corner join vs having them butt up against each other on the post.


The next beam (5 1/2" x 12" x 23') would sit across four posts and join at the 45 degree in the corner.  Used the same technique above to get the angle before trying to place.


Trying to pick this 500+lb beam up with two people wasn't an option but luckily I had the trusty Cat.  After slinging it, dad guided into place and I maneuvered it up on top of the other posts.  Pretty tough trying to be careful not to knock him off the ladder and get it up and over the saddle brackets.  It was great when we got it in place and 'pinned' it.


 Repeated the process for the other two beams and the main deck is now framed out.  We'll start the joists tomorrow.